

Hey guys, welcome to my blog!
This is the part one of the tutorial series titled “Notion Idea You Haven’t Thought Of”! The title originates from the release of the 3.0 Notion update, which introduced a new formula called style(). I noticed a lack of tutorials on how to incorporate this into the workspace. So, I thought I’d share three ideas on how you can utilize this.
Without further ado, let’s get started.

disclaimer & prerequisites
For this tutorial, you need Notion 3.0. You can download it using the link provided below or on my website. I also have a selection of pre-made templates made with love available for purchase, so do check them out. Note that we will be using Formula quite often throughout.
step 1: create a new inline database

•
To begin, create a new inline database in Notion. I am going to title it yearly overview and hide the database title!
step 2: create a new timeline view

•
Then, create a new timeline view.
step 3: set up properties in table view

•
Go back to the table view and delete all the database entries.
•
Delete the Tag property, and delete the Date property for now.
•
Then, we are going to add three more new properties.
◦
goal - Text property
◦
done - Checkbox
◦
cross-out - Formula property
•
I am simply adjusting the size of the property field to make it look nice!
step 4: create the cross-out formula
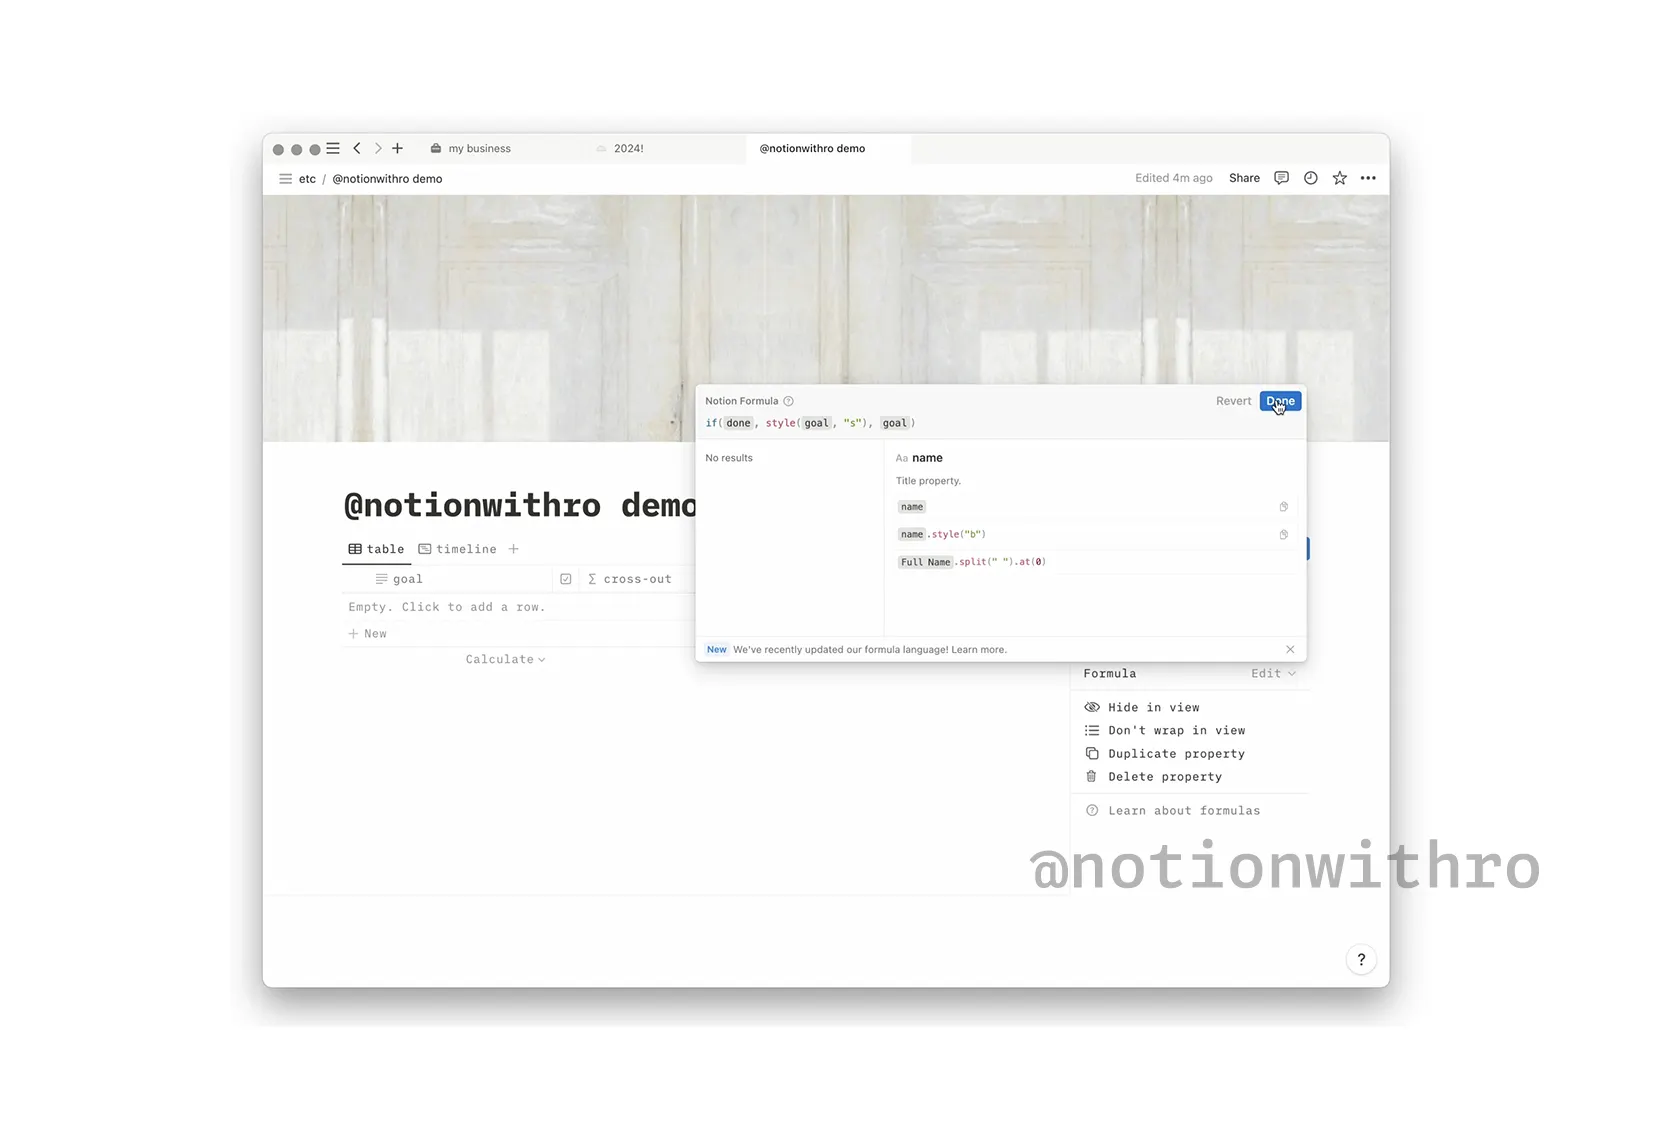
# Quick Note on How if works
if(condition, statement to execute when condition is true, statement to execute when condition is false)
Notion Formula
복사
if(prop("done"), style(prop("goal"), "s"), prop("goal"))
Notion Formula
복사
•
Click on cross-out, then Formula Edit. This opens a box to add a formula.
•
Type in the following Formula on the lefthand side.
•
The formula first checks if the done, the Checkbox property is marked. If true, it strikes through the text in the goal property. If false, it leaves the text in the goal unchanged.
step 5: create your first goal


•
Now, go to the timeline view. Simply create a new card by clicking anywhere within the timeline. Now, you will see a message “Type a name…”.. We are going to leave it blank so simply enter a space.
•
Click on the card to open it up. Hide all properties except for goal and done! Lastly, type in the goal and now create your first goal entry/card in the timelineview!
step 6: customize the cards on the timeline view

•
If your card appears different, it's possible that some properties are hidden. If that’s your case, go to timeline view. Click ••• → Properties → Hide all Properties. Then, show crossed out and done by toggling the eye-icon.
step 7: add dependencies

•
Next Click ••• → Click Dependencies → Choose the first option and Turn on dependencies.
•
Create a new card/entry in the database Again add space for the name the Title property and open up the card. I am going to hide all properties except for done and goal for clarity

•
Fill in your goal and close it. As you enable the dependencies, you'll notice a yellow arrow that you can drag to connect to another entry.
Feel free to create more entries and add more connection and now you are all set!
conclusion
Thank you for reading this tutorial! If you found it helpful, be sure to check out shop for my beautiful templates, which I am confident enough to say are a game-changer Subscribe to my newsletter and feel free to follow me on my social media for updates!
Subscribe to my newsletter and feel free to follow me on my social media for updates!Happy Notion(ing)!